Today we are going to be showing you how to use Zapier to create automations for your workflow within your social channels. This will give you the ability to share a video automatically to your Facebook, or other social channels, when you upload it onto YouTube. It’s an automated service, so once you set it up, you don’t have to think about it again!
This post contains some affiliate links for your convenience. Click here to read my full disclosure policy.
Getting Started: Using Buffer with Zapier
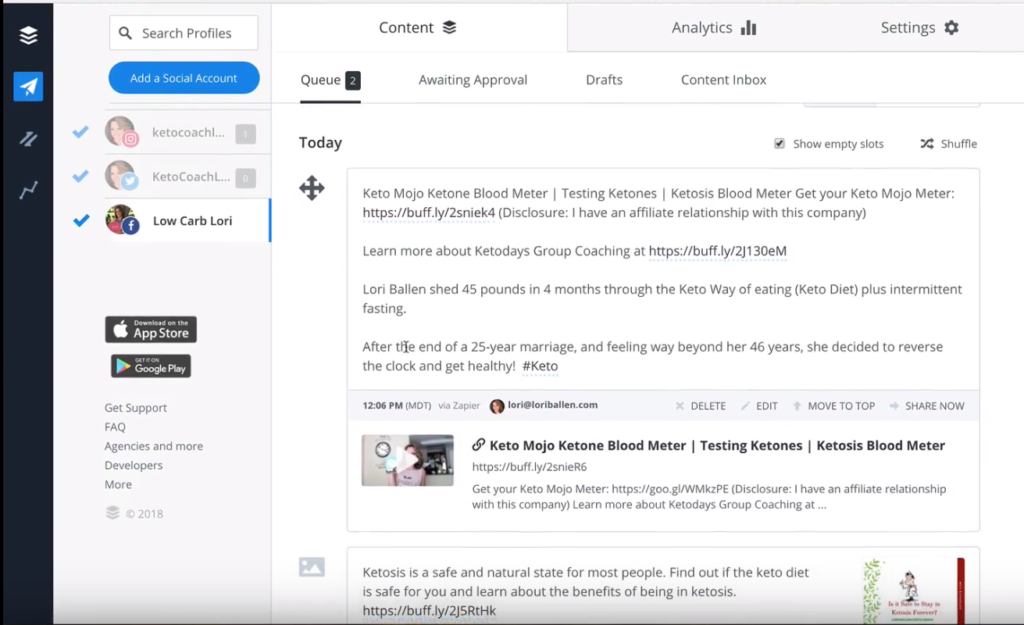
Today we’re going to be using Buffer, which is where all of my social posts are created, tracked, and monitored. Buffer has great analytics where you are able to see which of your posts are popular, which ones got likes, shares, reach – things like that.
For example, I can go down the list on the left hand side where all my social media accounts are and if I click my Keto Coach Lori Instagram, then I can view all the analytics for that specific account to make sure it is performing well.
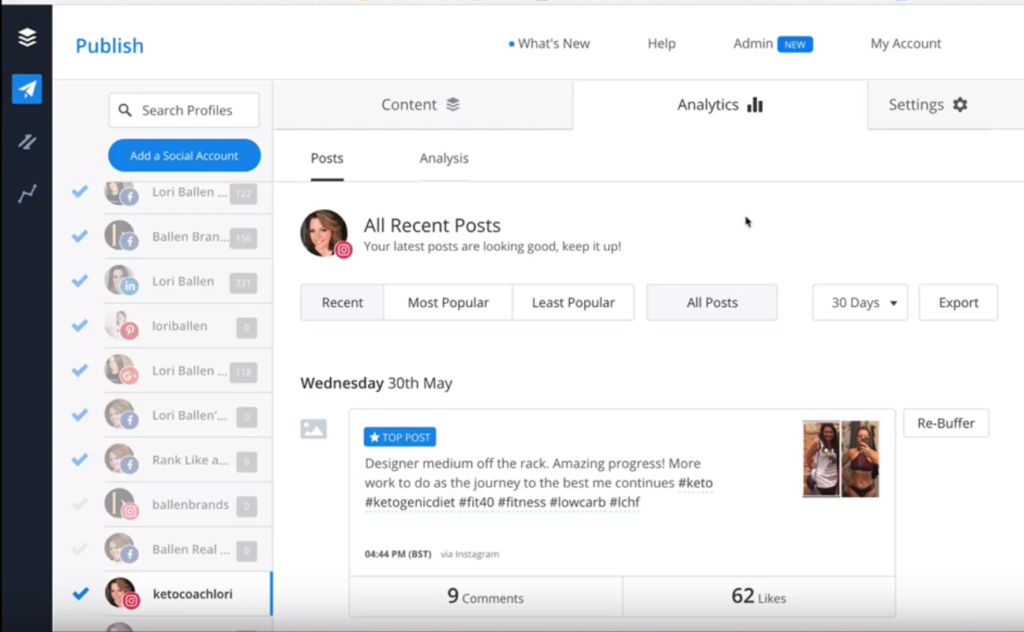
Buffer also allows you to set all your content in a timed queue so they will release it automatically according to a preset schedule.
Another cool thing about this is that you can actually see which posts are your most popular posts and rebuffer that and put it back into the queue to go out again.
Before you get started with Zapier, you might consider setting up a Buffer account, setting up all your social channels and then from there, going into Zapier to set up your formulas.
Making A Zap: Steps 1-3
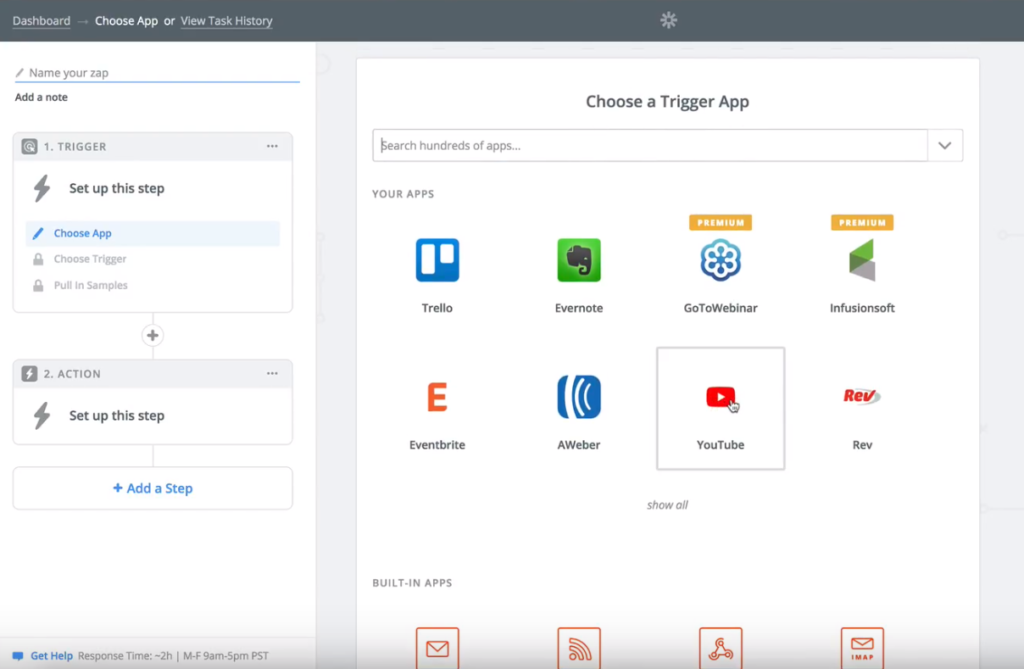
Your first step is to sign up with Zapier. Once you set up your account, go ahead and click on the button in the right hand corner that says, ‘Make a Zap’.
From here, we have to choose a trigger app. Today we are going to be using Youtube and Buffer as an example, so we are saying if Youtube, then Buffer.
Now, don’t get too confused by that. What I mean is if a video gets published on YouTube from my account, then send it to Buffer. That’s what we will be setting up today.
Step 1: Choose your trigger app (this example we are clicking on YouTube)
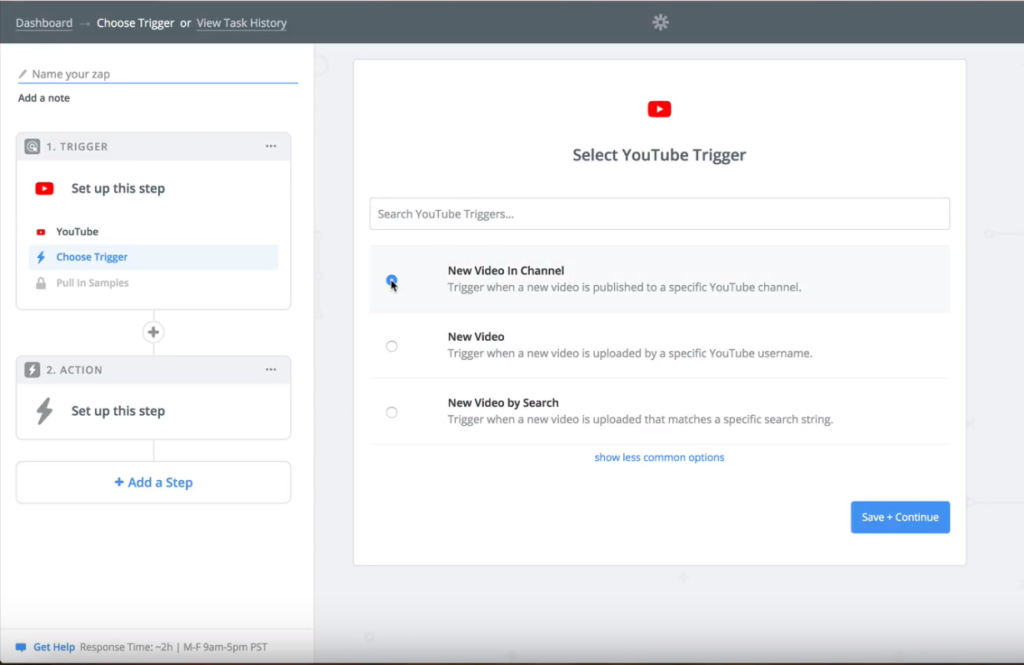
Step 2: Select YouTube Trigger
Here we are saying that we want the trigger to happen when a new video is published to a specific YouTube channel. Select that, and press save and continue.
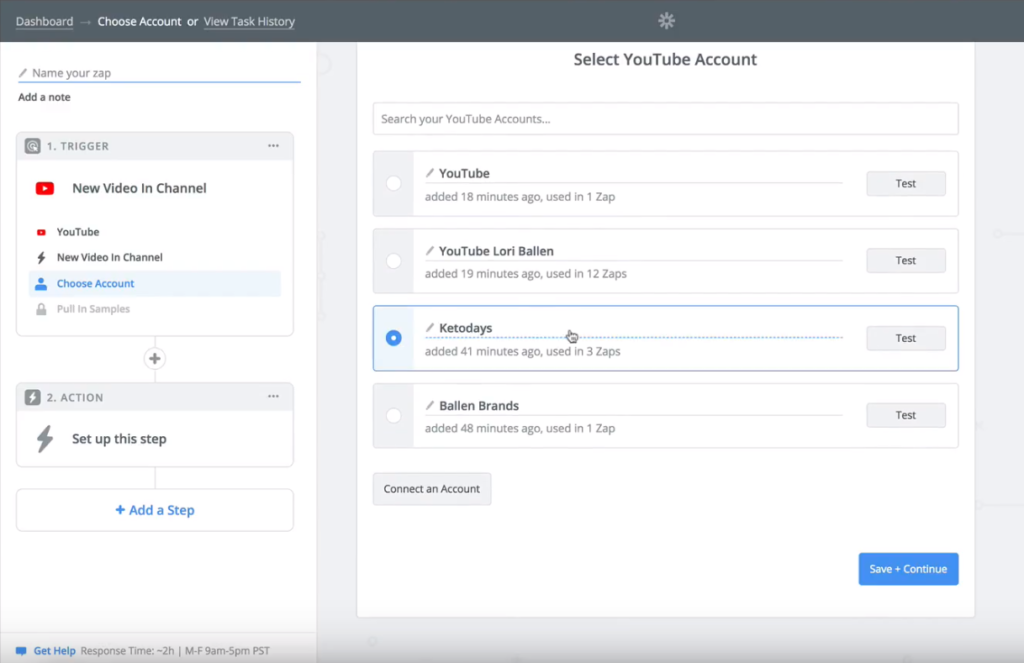
Step 3: Select Your YouTube Account
Now this is where you choose from your YouTube channels, which one you would like to use. Mine are already preset. At this point, if you don’t have any channels set up them up and then click ‘Connect an Account’.
For this example, I’m going to use my Keto Days Coaching channel and then click save and continue.
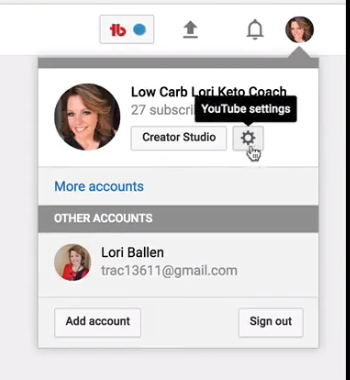
Finding YouTube Channel Numbers
Every single time you set up a YouTube zap, you’ll have to enter your channel numbers. To find your channel numbers, head over to your YouTube account and just hover over your picture ID and click on the settings wheel that pops up underneath.
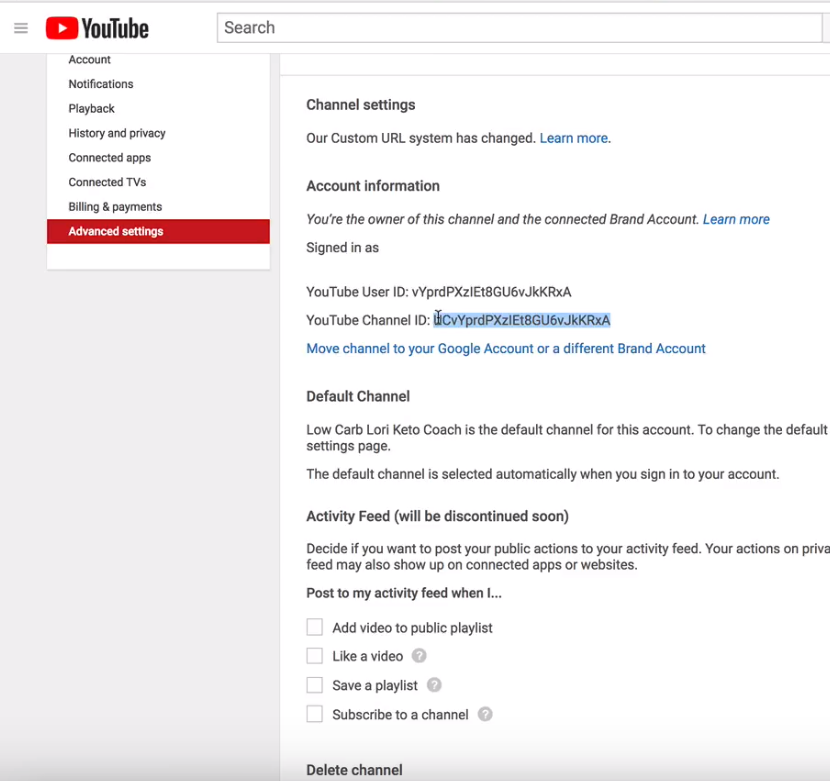
From there, you’ll want to go into Advanced Settings and that’s where you’ll find your Channel ID number.
Continuing with Zapier Steps 4-8
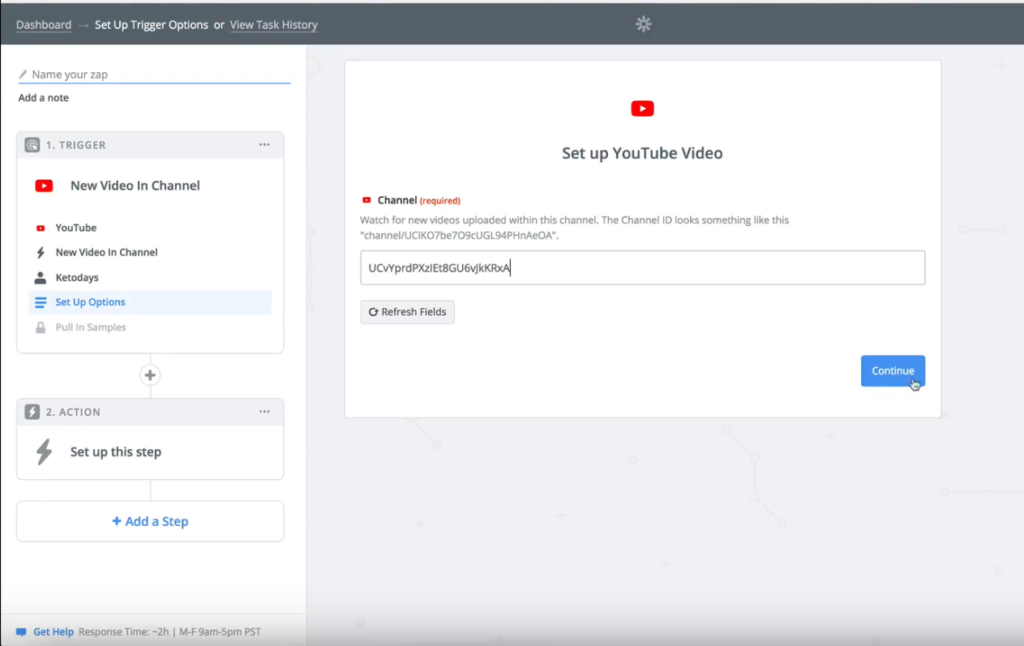
Step 4: Set up YouTube Video
This is where you’ll need to copy and paste your channel ID number into. Hit continue once that is done.
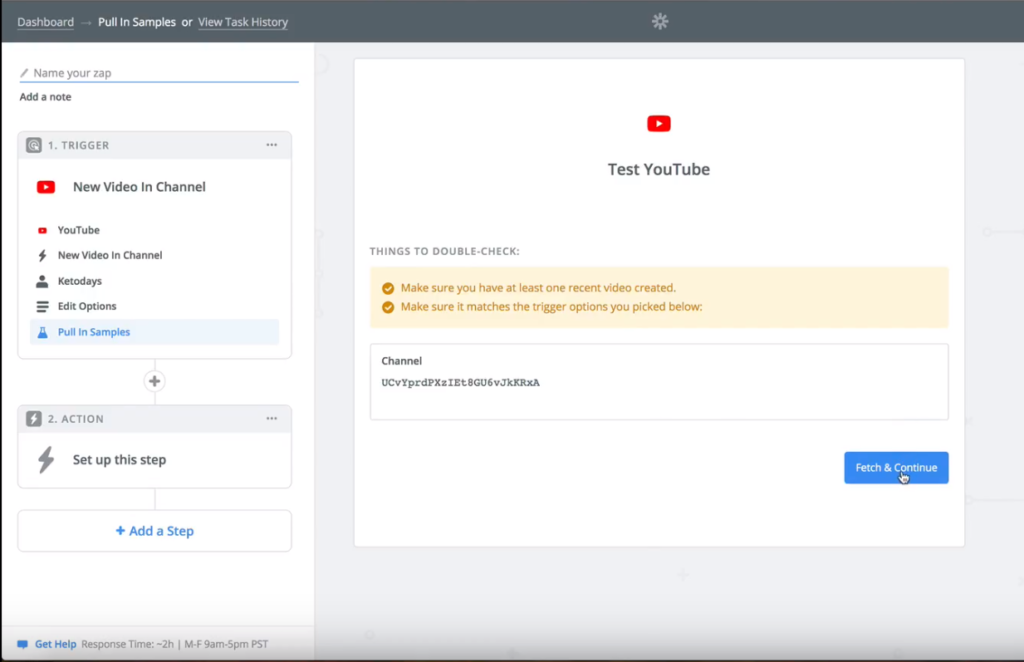
Step 5: Test YouTube
This is where it tells you what you need to double check. First, you want to make sure that there’s a video uploaded to the channel you’ve chosen. If you chose a brand new channel, you want to make sure you at least have a test video in there.
You also want to make sure that it matches the trigger. The trigger we chose here (Step 2) was if a published video shows up on the channel. After you’ve done your checks, click fetch and continue.
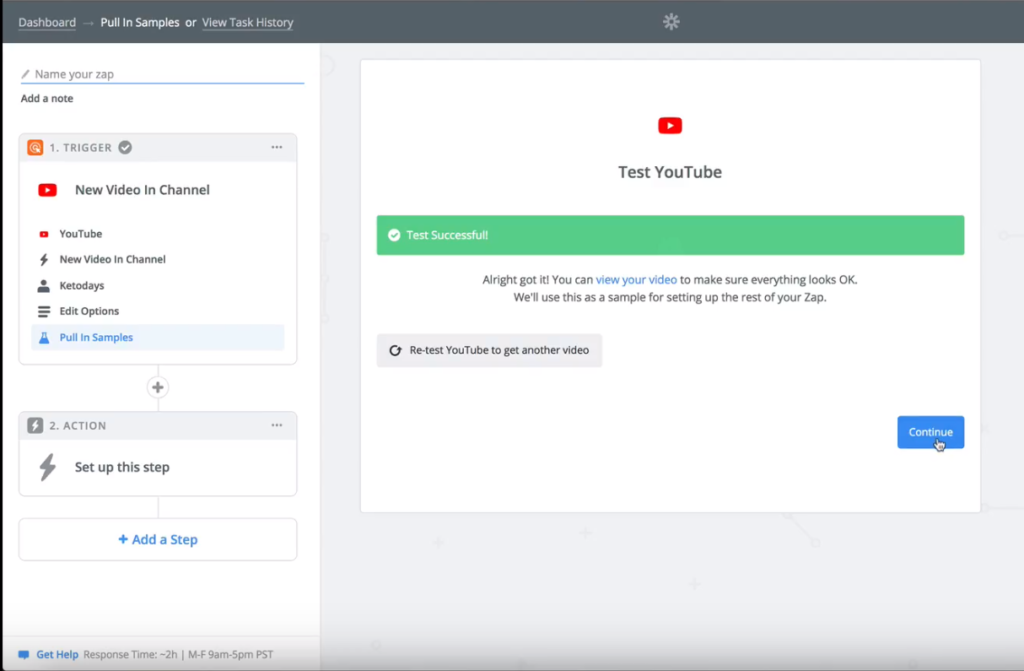
Then Zapier goes out to YouTube and it pulls in the last video that you posted. As long as it says successful on the next page, then you can continue.
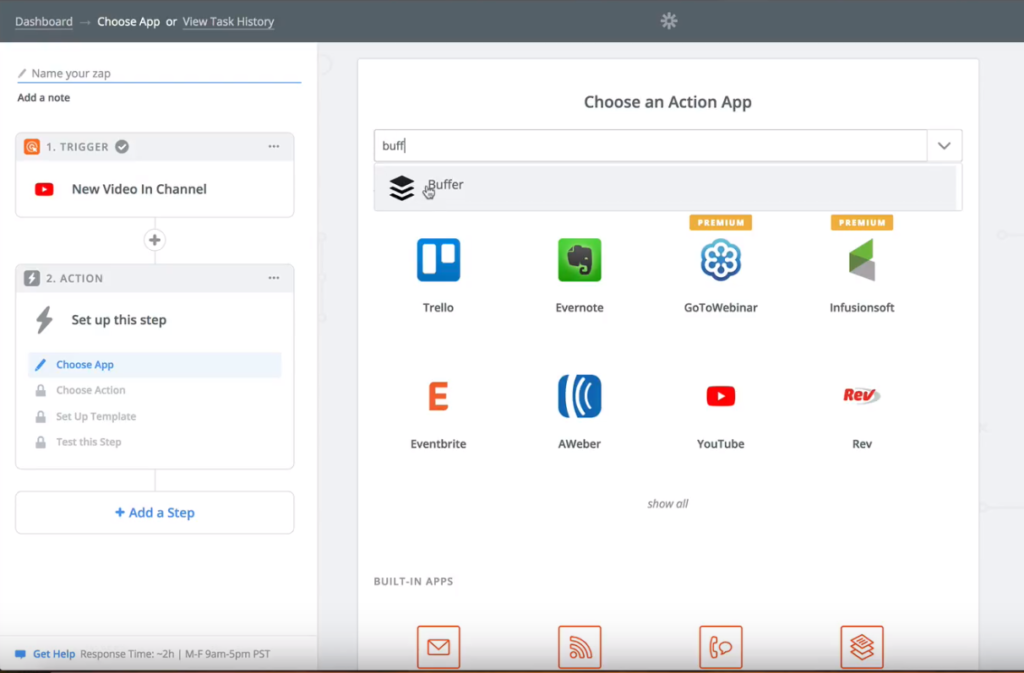
Step 6: Choose Action App
Now that we selected our trigger, we need to select the action. This is asking that if the YouTube video is published, then what action do we want Zapier to take? In this case, we want Zapier to feed it into Buffer.
If you don’t have Buffer then you can choose Facebook, or any other social media as your Action App. So Zapier will share the YouTube video onto whatever you choose automatically as it’s published on YouTube.
Once your Zap is all set up, your automated workflows are just there and you don’t have to think about it, it works forever as long as you are paying for those subscriptions.
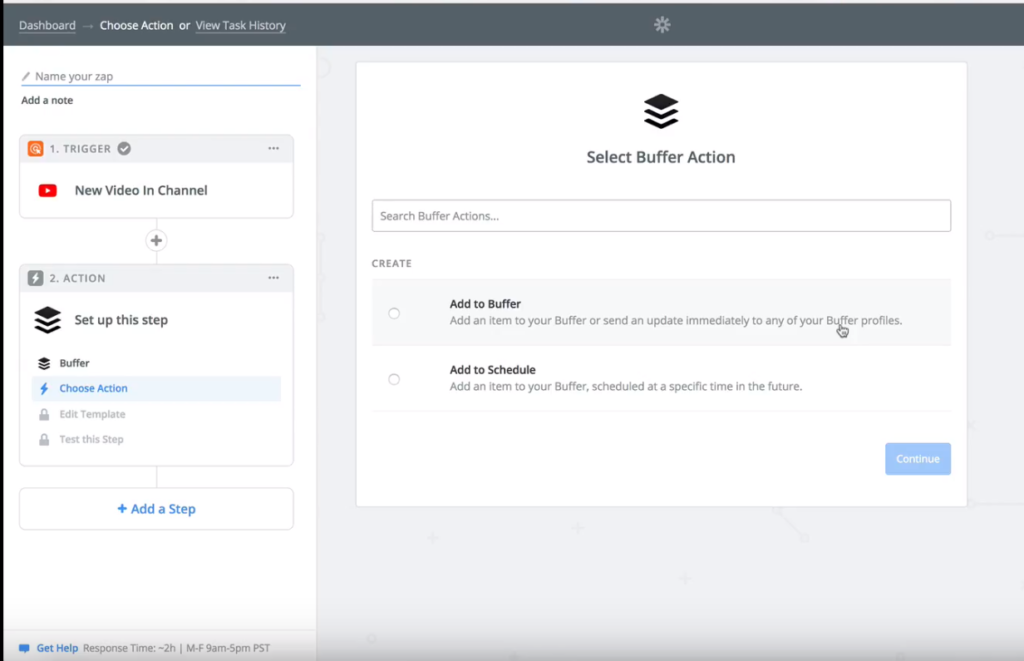
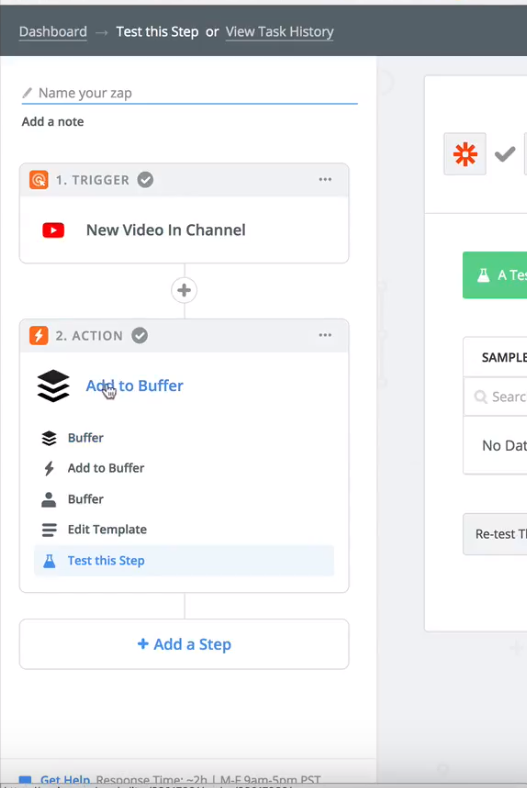
Step 7: Select Buffer Action
From there, we just click ‘Add to Buffer’ and save and continue.
Step 8: Select Buffer Account
Then Zapier needs to know which Buffer account you want to use. If you had not set it up yet, you would click ‘Connect an Account’ and it would ask you to allow access for your Buffer account.
The account we are using today is already here, so I’ll select that and click save and continue.
Setting Up Buffer Template Steps 9-12
Step 9: Buffer Profile
Next it’s asking us which profile from Buffer that you want to use for your video. To do this, we click the little dropdown box and you will see all the profiles that you have set up on your Buffer account.
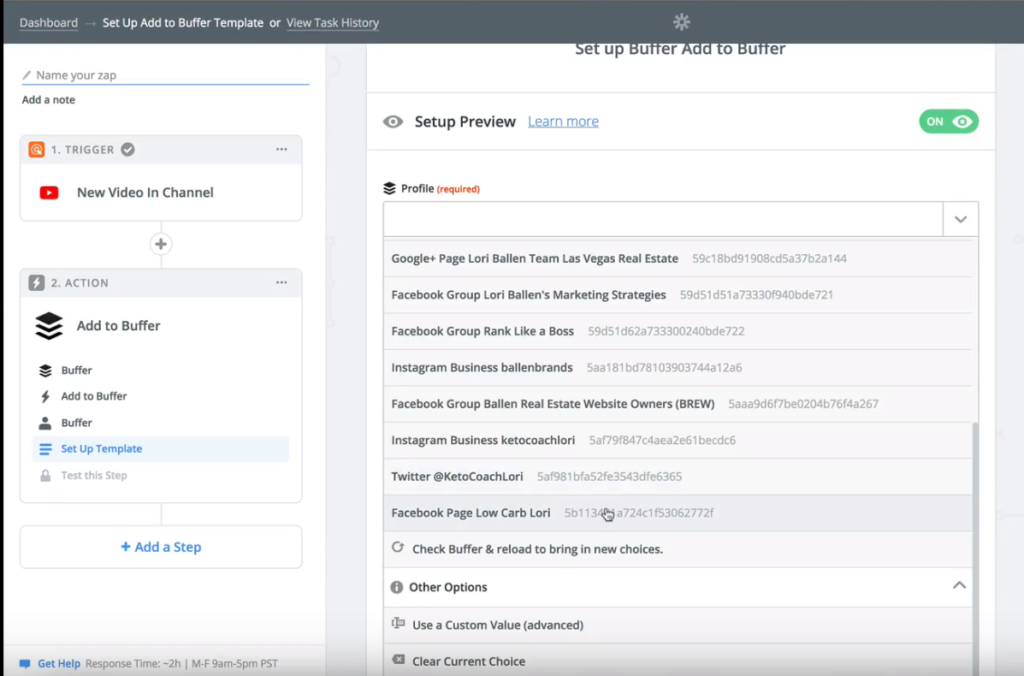
For this example I’m using my Keto Facebook page, Low Carb Lori, so I’m going to select that. What this is essentially saying is that if a video shows up in my Keto Coaching YouTube channel and it’s on a published status, then send it to my Facebook page.
There are other triggers, but I want to make sure that those videos are published this way.
Step 10: Text
Next we have to create what we want the post to look like when it shows up on Facebook.
We can click the menu to the right of the text section, with the little plus sign and drop down some of the merge fields that we want to use in our tech.
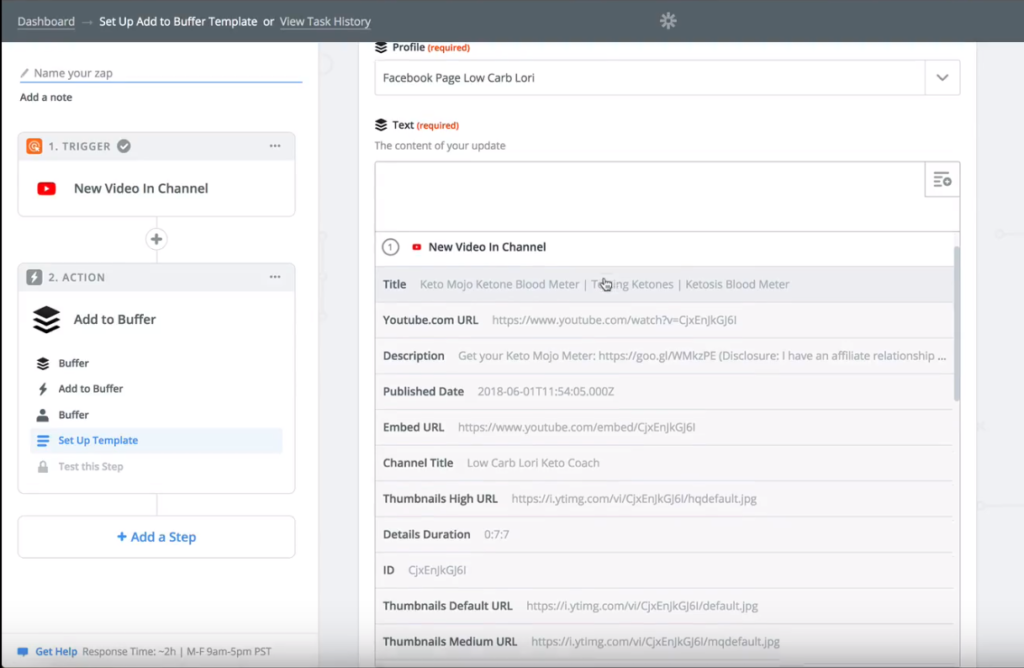
In the drop down menu, you can merge your title straight from your YouTube video. Using the title would look like this –
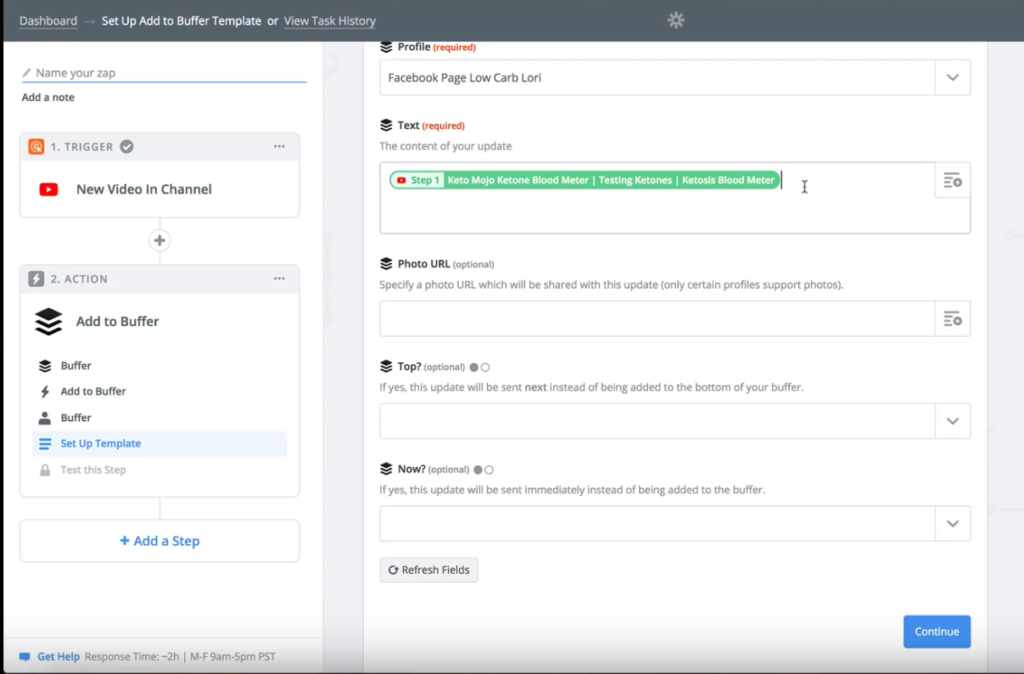
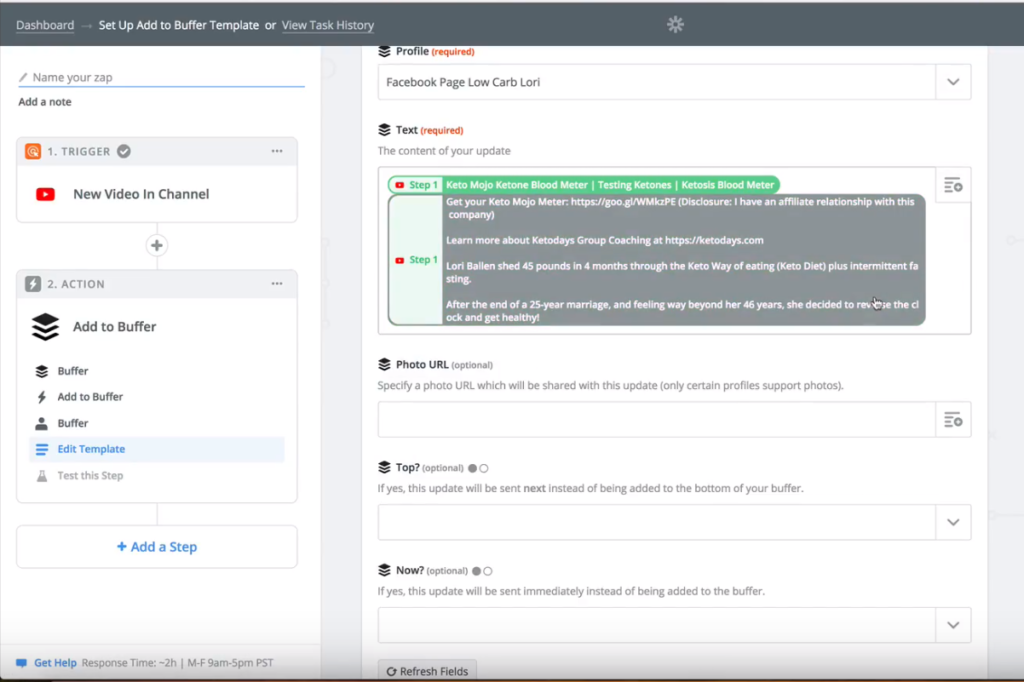
Personally, I also like to add the description of the video also, but just be careful of what that will look like and how many characters you have to use.
You can also simply type something in yourself, you don’t have to merge your content!
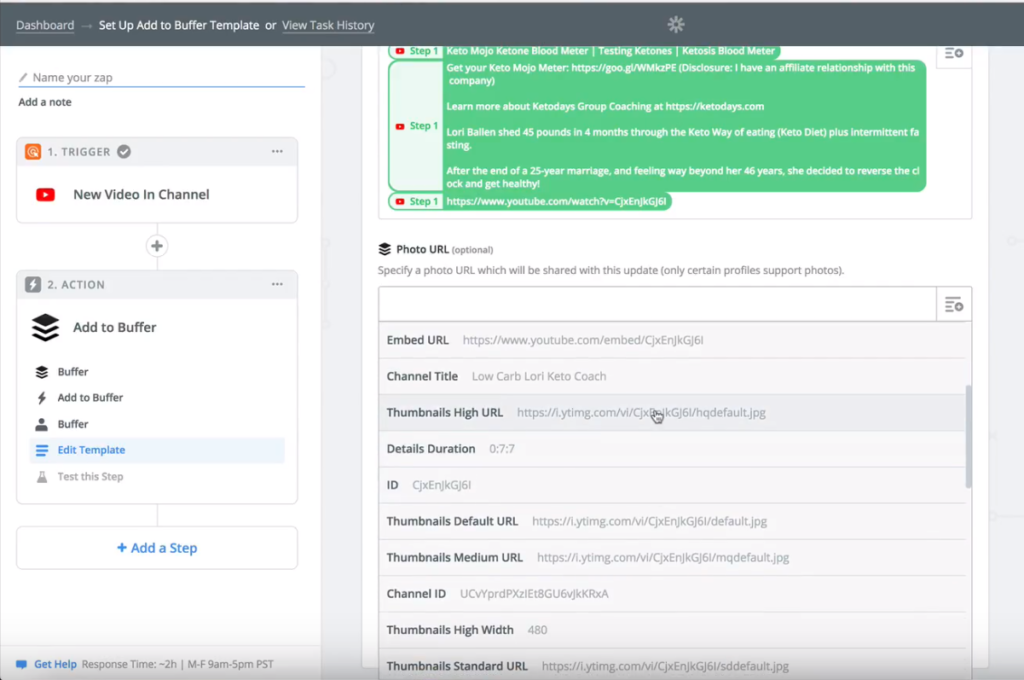
Step 11: Photo
Here we can upload what photo we want people to see. We can go to the merge menu again and allow it to pull a photo thumbnail.
Step 12: Top/New
Next, in the Top section we have to decide whether you want this to be sent to the top of your queue or just in the regular, scheduled order.
If you think this is going to be more important or fresher content for people, and you want to pull it straight to the top of your queue, then you’re going to click ‘Yes’ – I want this to go to the top of the queue.
In the New section, you want to choose ‘Yes’ if you want your video to be sent out immediately. For example, let’s say you decide your YouTube videos are the most important thing and that they should come before reviews, blog posts, things like that.
This means that this is taking priority and saying I want this video to go out this minute.
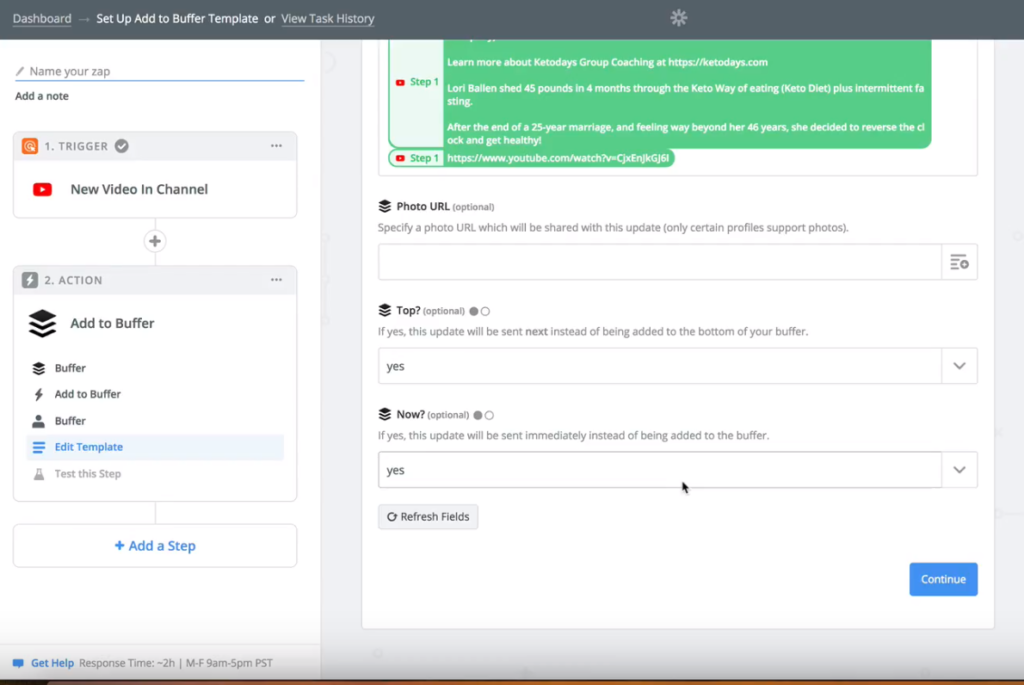
After you’ve done that, click continue.
Final Steps
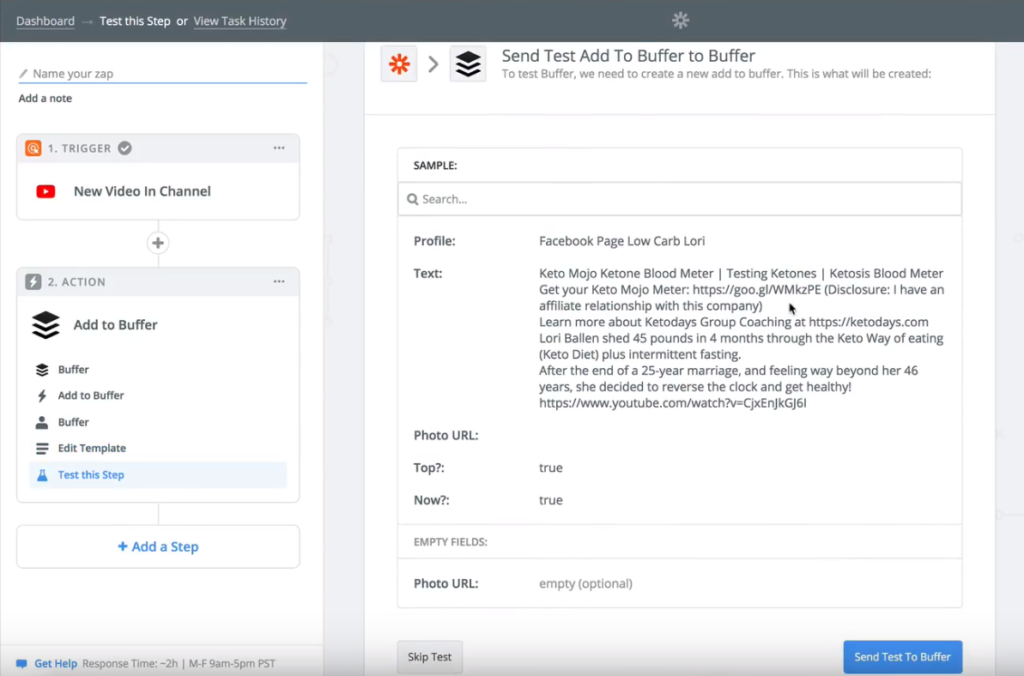
Step 13: Test Buffer
This next page is a sample, and we want to see what this will look like in Buffer. So I’m going to click ‘Send Test to Buffer’ so we can go in and see what this looks like in Buffer.
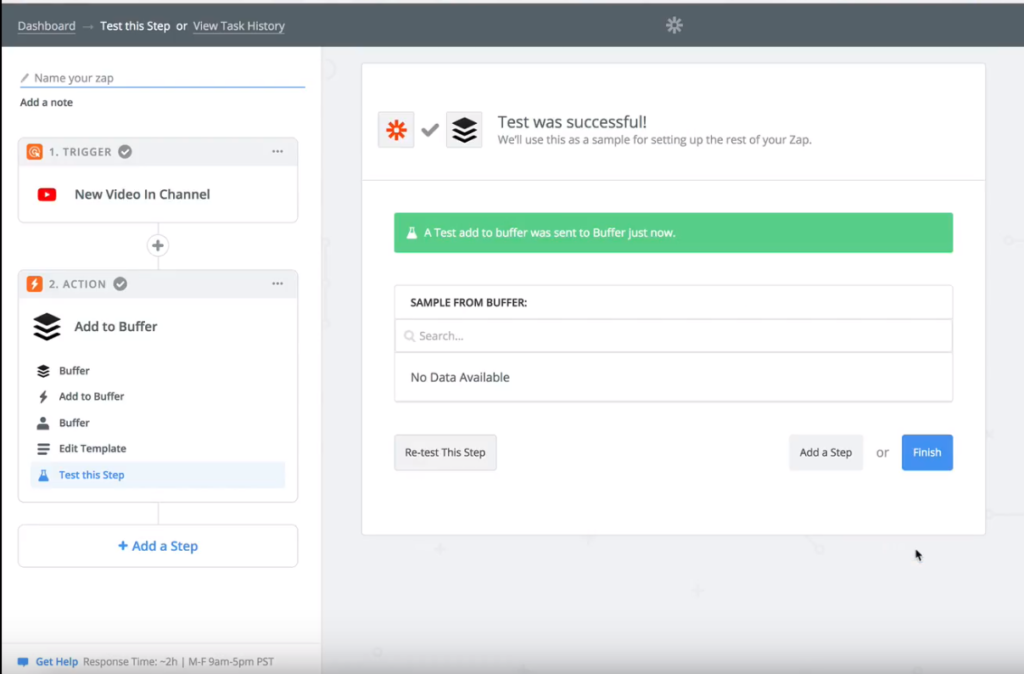
Once we’ve sent the test, we can see that it says on the next page that it’s been added to Buffer.
Step 14: Check Your Post!
Now that we’ve uploaded it to Buffer, and we selected the option to post the content immediately, we can head over to our Facebook page to see what the post looks like in real time.
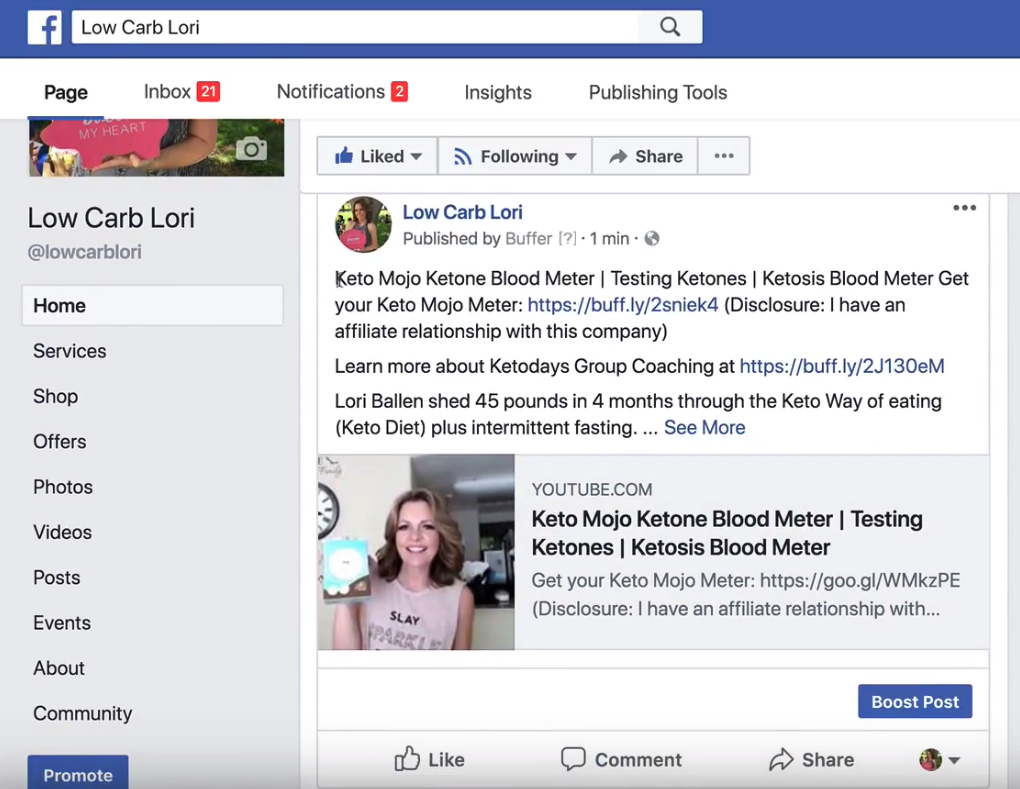
Our Facebook post showed up correctly – the title and description are there, and it pulled the thumbnail correctly for the video. If your visitor clicks the link, it will go straight to the video and they will be able to watch it.
If you want to change anything, you can just go back to Zapier and use the menu on the left hand side to select the section you want to go back and change.
To view your post in your Buffer queue, you’ll have to go back to the ‘Edit Template’ section and in the ‘New’ dropdown menu, select No.
This will not post your content immediately, and you will be able to then go to your Buffer and view your post there instead of on your live Facebook feed.
From here, you can edit the post, move it to the top of the queue, share it now, or delete it altogether!
That is how you set up a zap to automatically feed your YouTube video to a social channel through Buffer. It’s kind of a geeky process and it requires some time. If you’re interested in having somebody else do this for you then contact us at Ballen Brands and we can do all of this for you, as well as offering more YouTube optimization services. Thanks for joining me today!

Best Real Estate Website Builders (And Why Agents Keep Choosing Ballen Brands)
This guide breaks down the best options on the market right now, what they do well, where they fall short, and how to choose the one that fits where your business is actually headed
How to Decide If You’re Ready to Invest in a Real Estate Website
Before you invest, it helps to look at your goals, your capacity, your current marketing gaps, and the long-term role you want your website to play.
What You’re Actually Paying for When You Invest in a Real Estate Website
Before you decide whether the cost feels too high, it is worth slowing down and asking a better question: what are you actually paying for?
Why Your Real Estate Website Is a Long-Term Business Investment
A strong real estate website gives your business structure, continuity, and long-term usefulness in a way that a temporary marketing expense cannot.

Best Real Estate Website Builders (And Why Agents Keep Choosing Ballen Brands)
This guide breaks down the best options on the market right now, what they do well, where they fall short, and how to choose the one that fits where your business is actually headed
How to Decide If You’re Ready to Invest in a Real Estate Website
Before you invest, it helps to look at your goals, your capacity, your current marketing gaps, and the long-term role you want your website to play.
What You’re Actually Paying for When You Invest in a Real Estate Website
Before you decide whether the cost feels too high, it is worth slowing down and asking a better question: what are you actually paying for?

Why Your Real Estate Website Is a Long-Term Business Investment
A strong real estate website gives your business structure, continuity, and long-term usefulness in a way that a temporary marketing expense cannot.