In this WordPress 101 guide, we’ll give you a crash course in everything you need to know about WordPress. We’ll cover topics like installation, themes, plugins, and more. You’ll be ready to start building your WordPress website by the end of this guide. Let’s get started!
What is WordPress?
WordPress is a content management system (CMS). Having a robust content management system provides a way for you to create and manage your website’s content. WordPress is one of the most favored CMSs in the world, powering millions of websites.
One thing that makes WordPress so popular is its flexibility. You can use it to create any website you want, from a simple blog to a complex eCommerce store. WordPress is also open source, which means it’s free to use and modify.
How do I install WordPress?
There are two ways to install WordPress: your web host or WordPress.org.
Installing WordPress through your web host is the easier option. Most web hosts provide a one-click WordPress installation process, which means all you have to do is click one button, and WordPress is installed on your website.
You can also install WordPress yourself by downloading it from WordPress.org. However, installing WordPress yourself is a more advanced option and requires setting up your database. We recommend using the one-click installation process if you’re not comfortable with this.
If you are ready to make the move to WordPress, Ballen Brands has low-cost monthly hosting packages that include your WordPress platform. In addition, they have completely set up packages that include design elements, analytics, SEO tools, and more. Call 702-917-0755.
How do I use WordPress?
Once you’ve installed WordPress, you can log in to your website’s admin area to start creating content. The admin area is where you’ll manage all of your website’s settings and content.
To log in to the admin area, go to your website and enter the following address: https://www.yourdomain.com/wp-admin.
You’ll be asked to enter your username and password. The default username is “admin,” and the default password is “password.” You can change these later if you’d like.
Once you’re logged in, you’ll see the WordPress admin area. This dashboard is where you’ll create and manage your website’s content.
How do I choose a WordPress theme?
WordPress themes let you change the look and feel of your website. There are literally thousands of free and premium WordPress themes available, so you’re sure to find one that suits your needs.
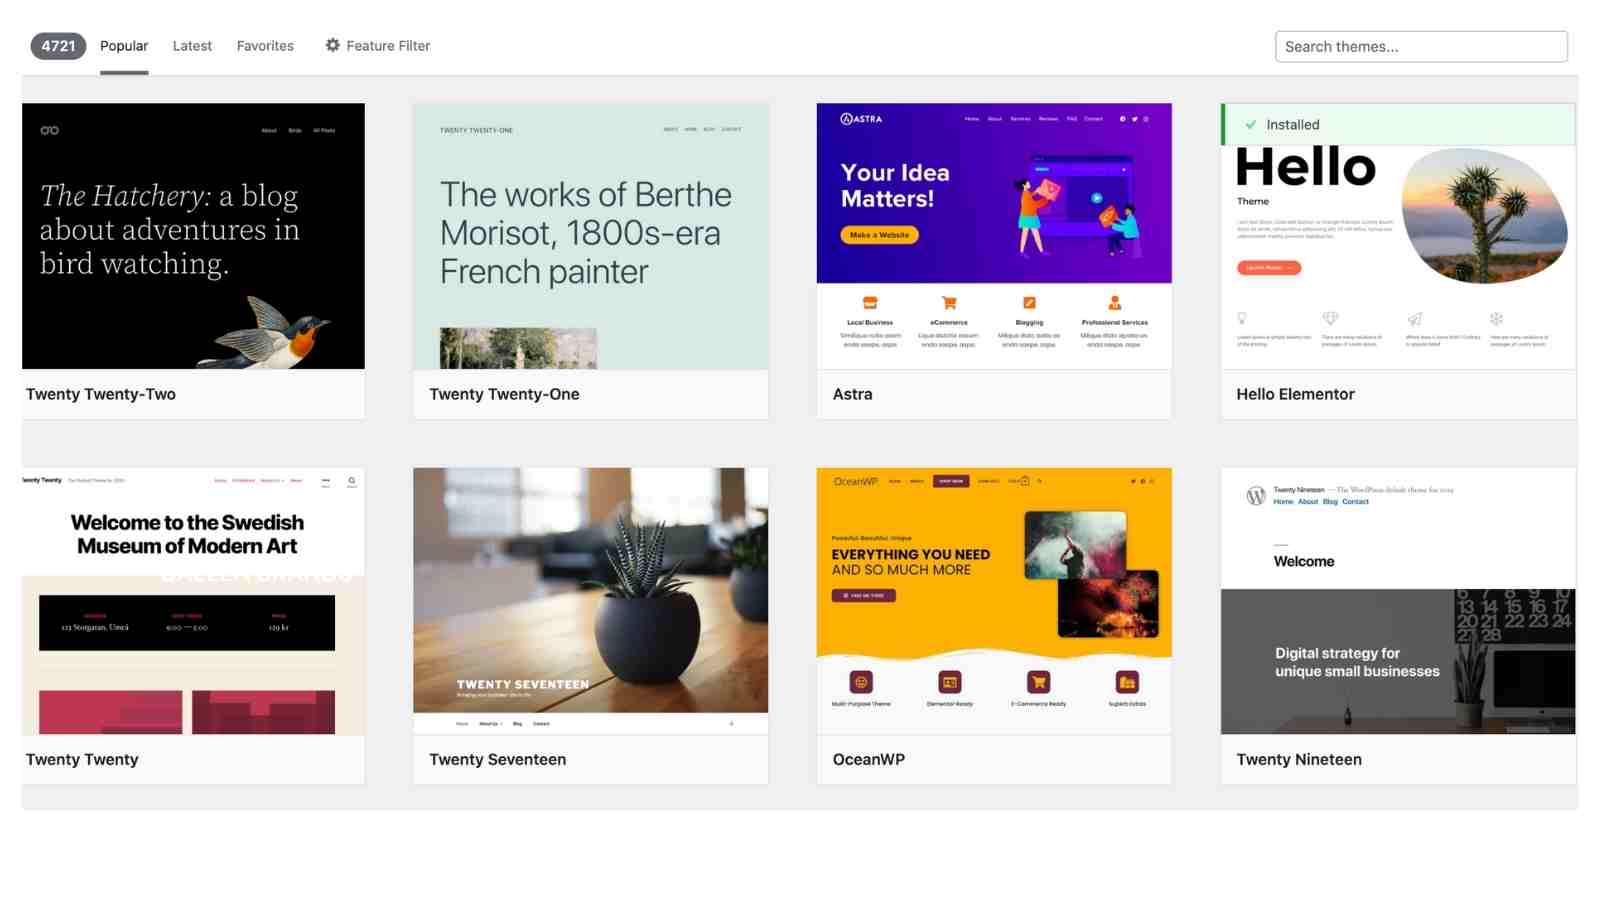
Go to your admin area’s “Appearance” section to choose a WordPress theme and click “Themes.” Then, you can browse through the available themes and preview how they would look on your website.
When you find a theme you like, click “Activate” to activate it on your website. Of course, you can always change your theme later if you want.
A theme customizer is a tool that allows you to customize your WordPress theme without having to edit any code. Go to your admin area’s “Appearance” section to access the theme customizer and click “Customize.”
You can change things like your website’s colors, fonts, and layout. You can preview the changes you make in real-time to see how they look before you publish them.
How do I Add a Menu?
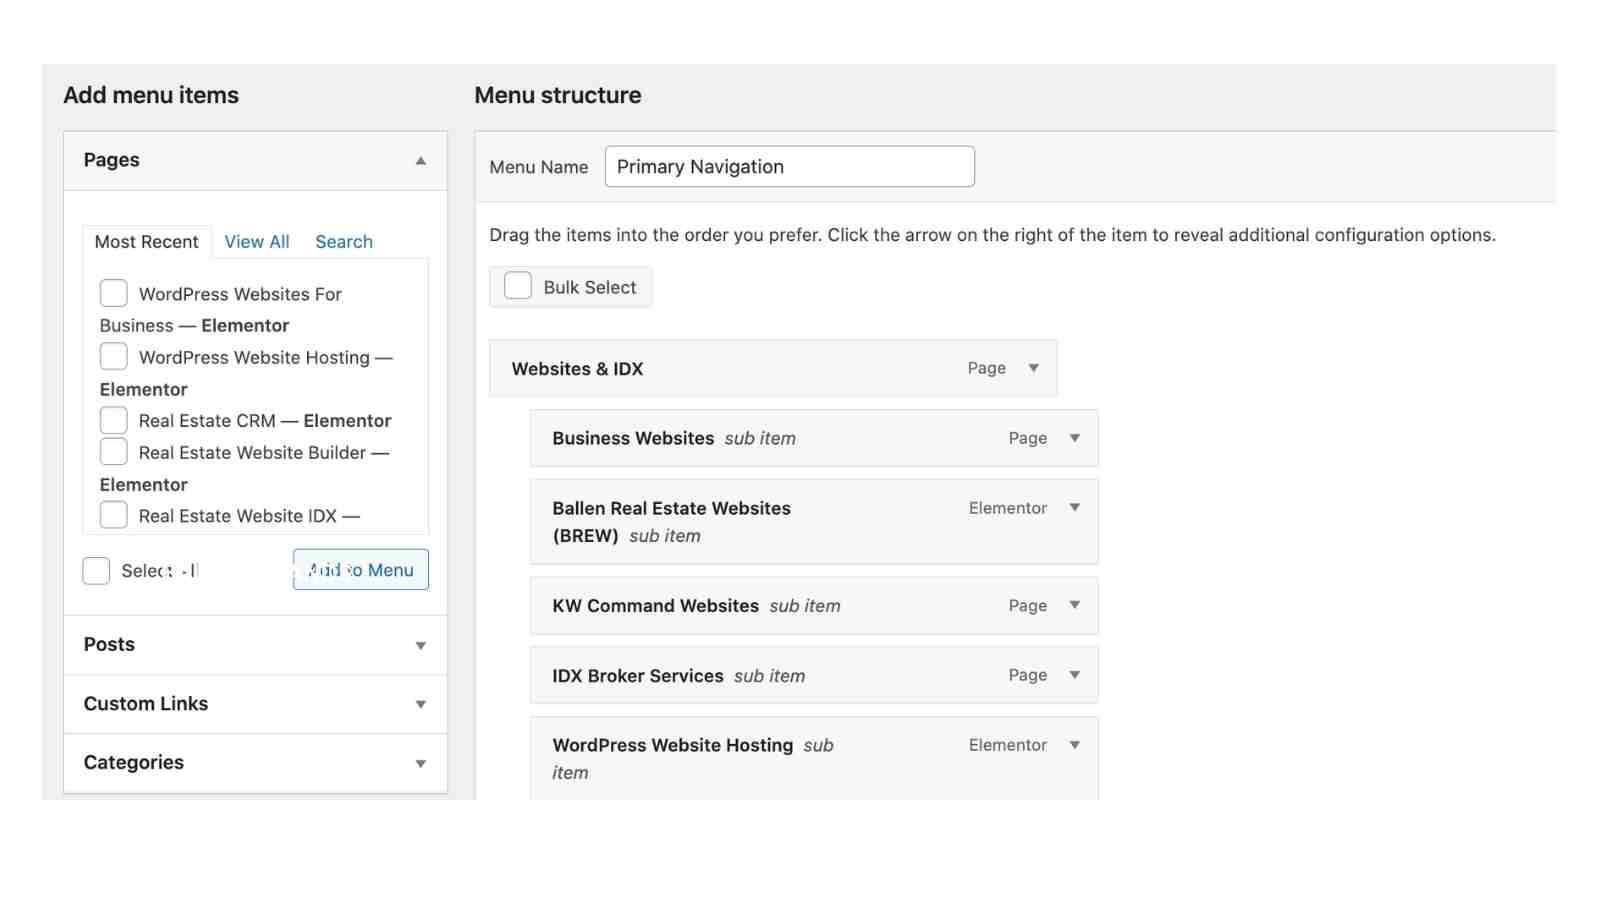
WordPress menus allow you to create and manage your website’s navigation. To add a WordPress menu, go to your admin area’s “Appearance” section and click “Menus.”
You can create a new menu or edit an existing one. To add items to your menu, check the boxes next to the pages or posts you want to add and click “Add to Menu.”
You can also rearrange the order of your menu items by dragging and dropping them into place. Once you’re happy with your menu, click “Save Menu” to publish it on your website.
Depending on your theme, you can add menus to different areas of your website. For example, some themes have a primary menu in the header and a secondary menu in the footer.
How do I add WordPress Widgets?
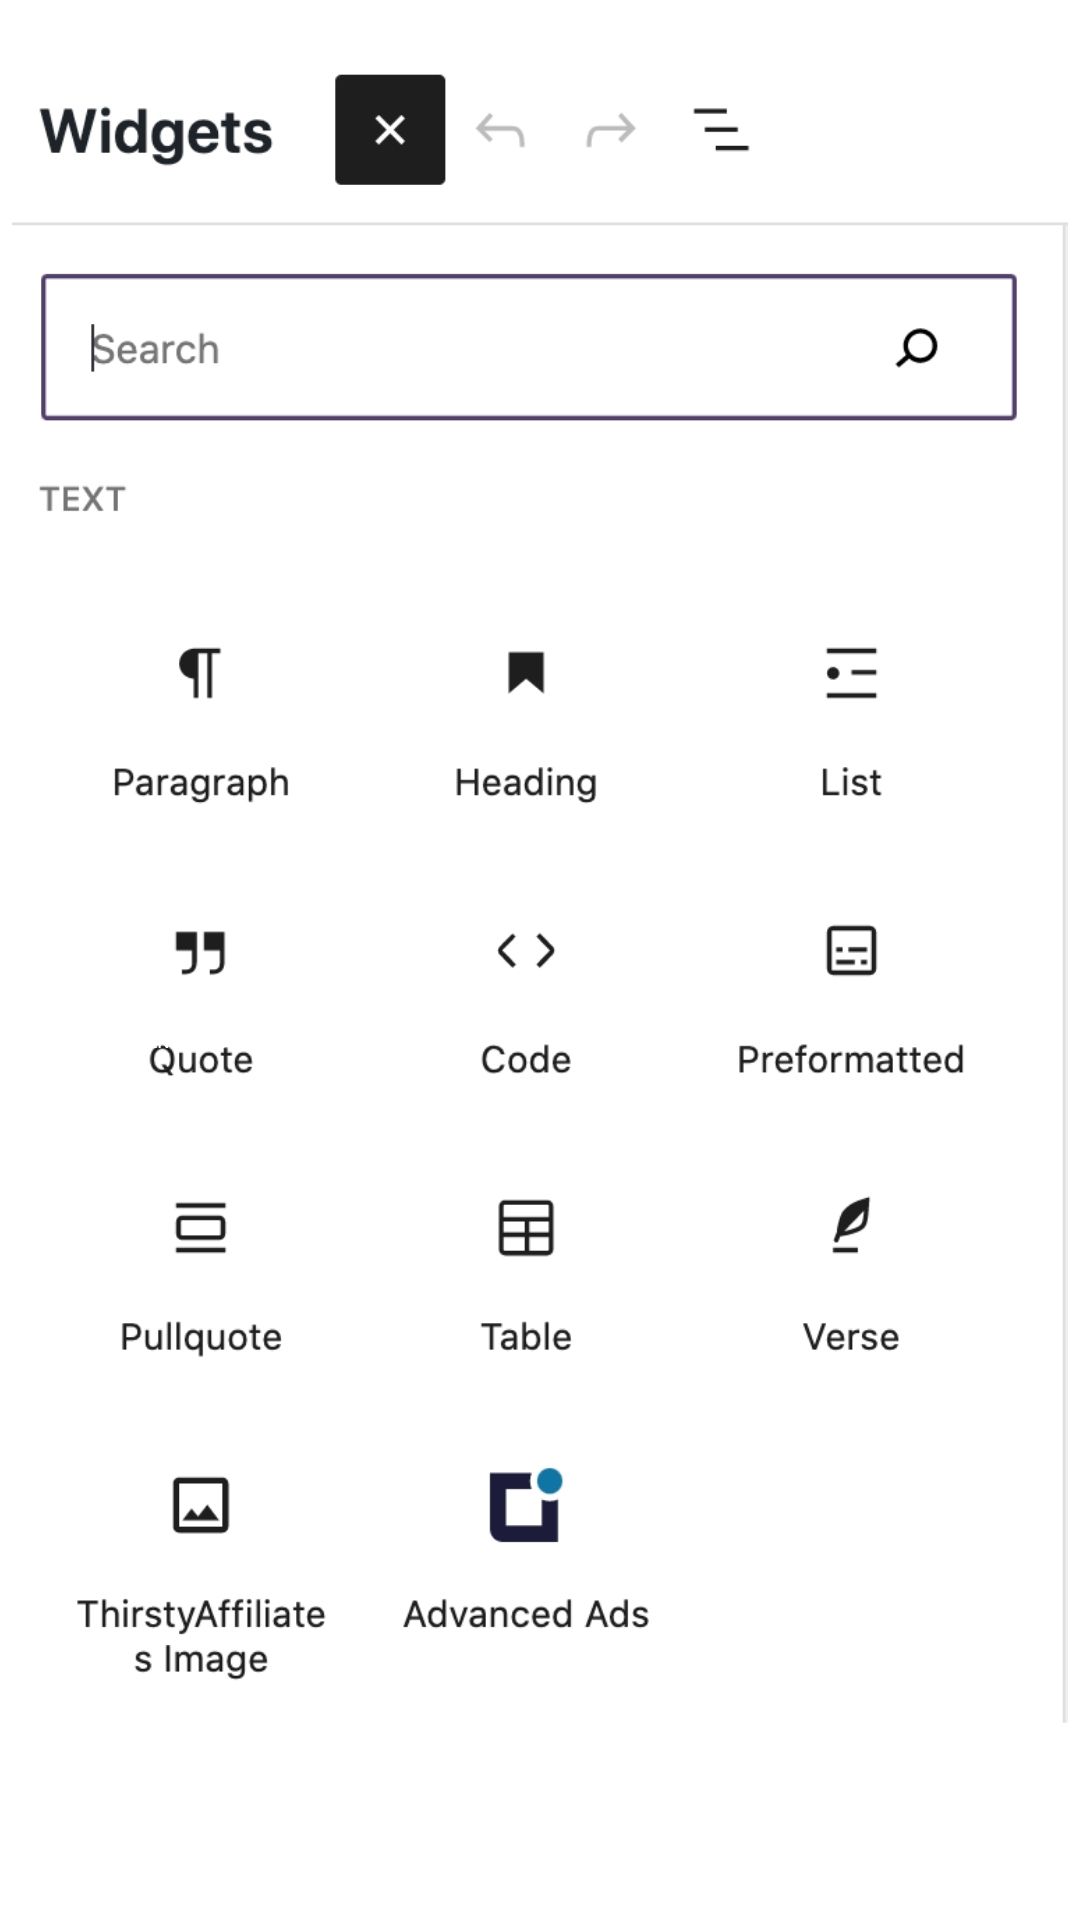
WordPress widgets allow you to add content and features to your website’s sidebar. To add a WordPress widget, go to your admin area’s “Appearance” section and click “Widgets.”
From here, you can drag and drop widgets into the sidebar area of your website. You can also edit each widget’s settings by clicking the “Edit” link.
Once you’ve added all the widgets you want, click “Save Changes” to publish them on your website. Depending on your theme, you may have different widget areas available. For example, some themes have a sidebar widget area and a footer widget area.
How do I install WordPress plugins?

WordPress plugins allow you to add features and functionality to your website. There are thousands of free and premium WordPress plugins available, so you’ll find one that suits your needs.
To install a WordPress plugin, go to your admin area’s “Plugins” section and click “Add New.” You can search for a plugin by keyword or browse through the available plugins.
When you find a plugin you like, click “Install” to install it on your website. Of course, you can always activate or deactivate plugins later if you want.
What are WordPress Taxonomies?
WordPress taxonomies are a way of categorizing content on your website. There are two main types of WordPress taxonomies: categories and tags.
Categories allow you to group posts together by topic. For example, you might create a category for “Recipes” and another category for “Blog Posts.”
Tags allow you to add keywords to posts. For example, you might add the tag “Italy” to a post about your trip to Italy.
Add as many tags and categories as you want to each post. WordPress will automatically generate archive pages for both categories and tags, making it easy for your readers to find content on your website.
What is the Difference Between Pages and Post?
Posts are the primary type of content on a WordPress website. They are similar to blog posts, but you can also use them for other types of content, such as product pages or team member bios.
Pages are different from posts because they are not part of the blog timeline. Instead, they are generally used for static content, such as your website’s home page or contact page.
How do I Back Up My WordPress Website?
Backing up your WordPress website is a good idea if something goes wrong. There are a few ways to back up your website, including using a plugin, manually copying your files, or using a service from Ballen Brands.
To backup, your website using a plugin, go to the “Plugins” section of your admin area and install the WordPress backup plugin. After the plugin is installed, it will automatically backup your website for you.
If you want to back up your website manually, you can copy your website’s files using FTP or cPanel. Copying these files is a good option if you’re going to keep a copy of your website’s files on your computer.
Finally, check with your web host to see if they do backups for you. If you are using Ballen Brands, your website is backed up nightly.
What is WordPress Gutenberg?
Gutenberg is the new editor for WordPress that makes it easy to create custom content. For example, Gutenberg allows you to add content blocks, such as paragraphs, images, and videos, to your posts and pages.
To activate Gutenberg blocks, you may need to activate it by visiting settings -> Writing -> Enable Gutenberg Blocks.
Once activated, you can add blocks by clicking the plus sign at the editor’s top. Blocks are added above your post or page’s content, so you can quickly move them around if needed.
Some examples of what you can do with Gutenberg blocks are:
- Add an image gallery
- Create a call to action
- Insert a video
- Include a map
- Display a product
- Add a quote
- Embed a Video
The best feature of Gutenberg is the ability to create a block and save it to the reusable library. Then, you can easily add the block to any post or page without copying and pasting the code. Keeping reusable blocks is a great way to create custom content quickly and easily.
What is an Excerpt?
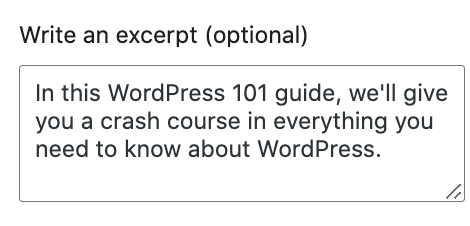
An excerpt is a summary of a post or page. It is typically used on blog homepages, RSS feeds, or email newsletters.
To add an excerpt to a post or page, go to the “Excerpt” section in the WordPress editor. From here, you can enter a short summary of your content.
You can leave the field blank if you don’t want to include an excerpt. WordPress will automatically generate a summary of your post or page based on the first few sentences.
What is a Featured Image?
A featured image is a photo or graphic used to represent a post or page. It is often used in blog posts, social media, and email newsletters.
To add a featured image, go to the “Featured Image” section in the WordPress editor. You can select an image from your media library or upload a new image.
Check your theme for the suggested image sizes. Images can be resized using a plugin like ‘regenerate thumbnails’ when adding a new theme.
How Do I Create Content?
There are several ways to create content on a WordPress website. The most common way is to use the built-in WordPress editor. This editor allows you to add posts and pages and images and videos.
Go to the “Posts” section of your admin area and click “Add New” to create a post. You can enter your post’s title, content, and featured image.
Go to your admin area’s “Pages” section to create a page and click “Add New.” From here, you can enter your page’s title and content.
Here’s How:
Create a Title: Creating a title for your post or page is the first step in creating content. The title should be catchy and descriptive, so readers will know what your content is about.
To create a title, go to the “Posts” or “Pages” section of your admin area and click “Add New.” You can enter your post’s or page’s title in the “Title” field.
Add Your Content: Once you have a title, it’s time to add your content. The WordPress editor makes adding text, images, and videos to your posts and pages easy.
Add a short intro, body text, and featured image for a post. For a page, add your content in the “Content” field.
One of the great things about WordPress is the built-in editor that makes it easy to format your content. Choose the text you want to format and use the toolbar above it to format your content.
The toolbar allows you to make text bold or italic, add headings, create lists, and more. It also allows you to add links and embed videos or images.
Another great thing about WordPress is that it allows you to add media to your content easily. Media files include photos, videos, and audio files.
To add a photo, go to your admin area’s “Media” section and click “Add New.” You can select an image from your computer or upload a new image.
Go to the “Video” section of your admin area and click “Add New” to add a video. You can select a video from your computer or upload a new video.
To add an audio file, go to your admin area’s “Audio” section and click “Add New.” You can choose an audio file from your computer or upload a new audio file.
Once you’ve added your media, it will automatically be added to your content. Then, you can easily insert it into your post or page using the WordPress editor.
Publish Your Content: Once you’re happy with your content, it’s time to publish it. To do this, go to the “Posts” or “Pages” section of your admin area and click the “Publish” button. If you aren’t ready to publish your content, you can click the “Save Draft” button instead. If you want to schedule your content to be published later, click the “Schedule” button.
That’s it! You’ve now created your first piece of content on WordPress. For more tips on creating content, check out our ultimate guide to creating website content.
What are WordPress Settings?
WordPress settings are the options you can use to customize your WordPress website. These options include your site’s title, description, and URL.
To access your WordPress settings, go to your admin area’s “Settings” section. From here, you can change any of the default WordPress settings.
WordPress General Settings
The WordPress general settings allow you to change your website’s title, description, and URL.
Go to the “Settings” section of your admin area and click “General” to access these settings. You can enter your website’s title, description, and URL.
WordPress Reading Settings
The WordPress reading settings allow you to change how your website is displayed.
Go to the “Settings” section of your admin area and click “Reading” to access these settings. For example, you can choose how many posts are displayed on your home page, whether or not to show excerpts on your home page, and more.
WordPress Discussion Settings
The WordPress discussion settings allow you to change how comments are handled on your website.
Go to the “Settings” section of your admin area and click “Discussion” to access these settings. For example, you can decide whether or not to allow comments on your website, how comments are moderated, and more.
WordPress Media Settings
The WordPress media settings allow you to change how media is handled on your website.
Go to the “Settings” section of your admin area and click “Media” to access these settings. For example, you can choose how high-quality images are displayed, whether or not to automatically create thumbnails for images, and more.
WordPress Permalink Settings
The WordPress permalink settings allow you to change your website’s URLs.
Go to the “Settings” section of your admin area and click “Permalinks” to access these settings. From here, you can choose how your website’s URLs are structured. Some WordPress uses the “Day and name” setting, which structures URLs like this:
http://example.com/2017/09/12/sample-post/
The preferred setup is to use the post name option. Never change this setting after publishing posts and pages because it will create 404 errors on your website.
WordPress Users Settings
The WordPress user settings allow you to change how users are handled on your website.
Go to the “Settings” section of your admin area and click “Users” to access these settings. Then, you can choose whether or not new users must verify their email address before creating an account, how strong passwords must be, and more.
That’s it! You’ve now learned the basics of WordPress. If you would like help building your website, integrating 3rd party tools, or creating content, please call Ballen Brands at 702-917-0755.