Hey, this is Sabrina, I’m the Marketing Director for Ballen Brands. Today, I’m going to show you how to use the Infusionsoft Email Builder to customize emails for your audience. There are many different ways to do this. Today, I’m going to be doing an example for real estate, for an open house, for a property.
This post contains some affiliate links for your convenience. Click here to read my full disclosure policy.
Choose an Infusionsoft Email Template
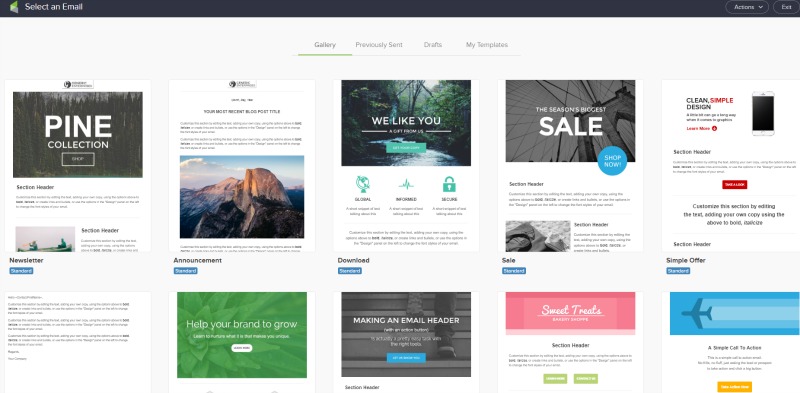
You want to be logged in to your Infusionsoft dashboard. From the Marketing Option, choose Email & Broadcasts. Once there, click Get Started to open the email editor. When you open the email editor, whether you’re sending a single broadcast or you’re building an email within the campaign builder, you’re going to be taken to the Infusionsoft email template screen. On this screen, you’ll be able to browse different templates that Infusionsoft has to offer. You can also look at your previously sent emails so you can copy a template from one that you recently sent. If you have any drafts in the system, you can pull them back up here.
You also have My Templates. Once you create an email, if you like the layout of it and you want to use it again, you can save it as a template for you to be able to use again later on. I’m going to use an announcement because it has that image right in the middle.
Remove Template Text and Images
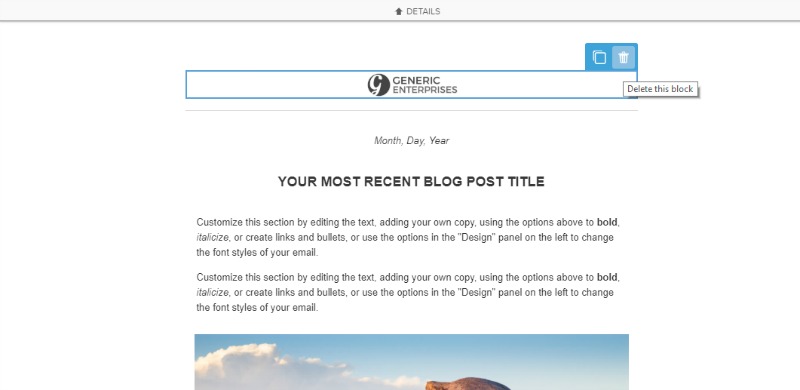
I’m going to delete all headers and text areas that are part of the current template. We’re going to start from scratch and add the elements that we need. I’m just clicking on each one hitting the trash can icon to delete. I’ll also delete the image so we’re starting with a blank template.
Suggested: Using Infusionsoft Campaigns to Automate Your Market
How to Add a Text Block
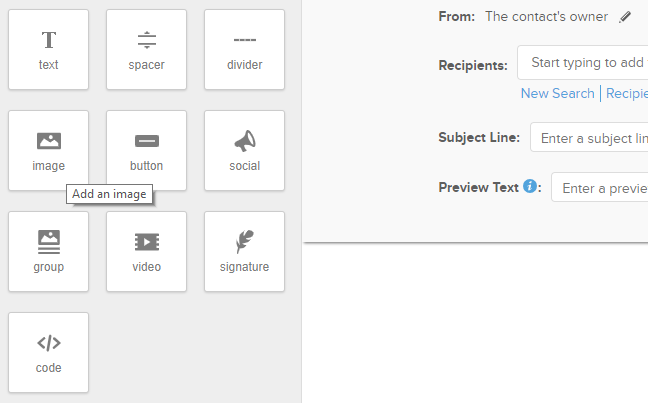
Go into the design option on the left-hand side and go over to block. From here, you have a few different elements. I’m going to go over these as we’re building the email. The first element I’m going to add is a text box. My goal with this text box is to put a little introduction message.
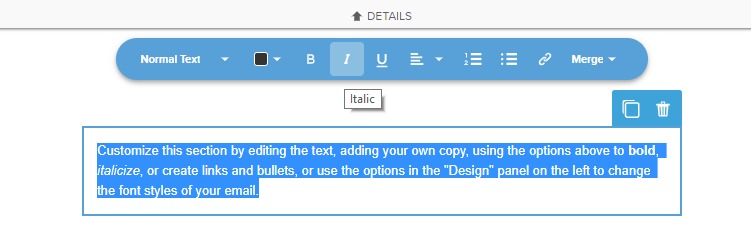
This one is going to primarily be email or image based. I’m going to add a clickable image for more details since I’m doing a listing here. If you highlight your texts, you have this little bar at the top that allows you to choose heading colors for your text. You can also use bold, italicize, and underline. You can change the alignment, make it a bulleted list, make a numbered list, and add a link.
You can also include merge fields from your contacts. So, if you want to include their name, personal names will populate in that field, which is pretty cool. It’s dynamic depending on who is actually receiving the email at that time.
How to Add an Image
I’m now going to add an image. This is just a drag and drop builder. You just drag the item from the left to where you want it in your email. I’m going to go ahead and upload my images to be used.
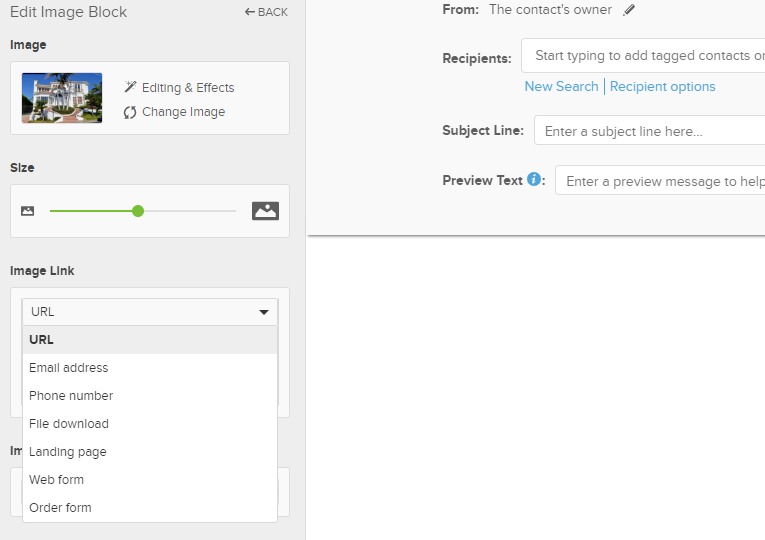
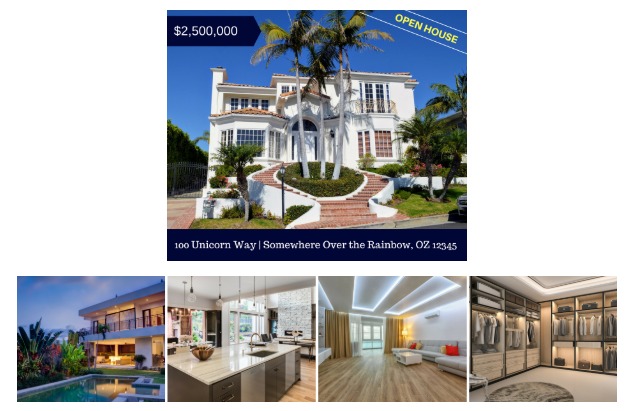
This is the image for the property. On the left-hand side, you have an option to change the size of the image to bigger or smaller. I’m going to make it as big as possible. You also have the option to insert an image link, which I definitely want to do for this particular image, especially since I’m telling them to click the image for more details. I’m going to copy the link from the page I want and link it to this picture.
Picked for You: Using the New Infusionsoft Landing Pages
Add Additional Images & Text
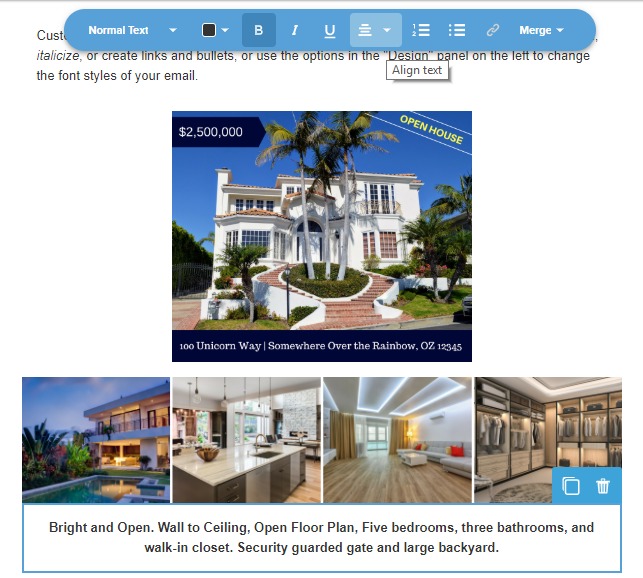
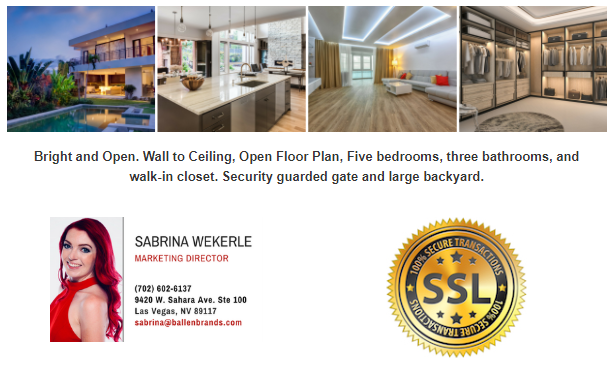
I’m going to add another image underneath the main image that’s going to have more pictures of the property. Now, these pictures I edited with the text and price in Canva. Canva is a free tool that you can sign up for and it’s really simple to be able to create these graphics in there. We do have a separate training video on Canva on our YouTube channel. You can also check it out at LoriBallen.com. I’m going to make that one big, as well. Now this image, I am going to link to the photo gallery option. On our property page, I’m going to right click on the view photo gallery link, and I’m going to hit copy link address.
I’m going to paste that here in the url for this bottom image. If they click on this image, it’s going to take them to the photo gallery, but since the photo gallery has forced registration, it’s going to ask them to register. Our goal is to get those registrations and leads in the system. That’s how we do that there. Since this is supposed to be an open house, you may want to link this first image to the open house blog on your real estate agent website. If you’re not doing it for an open house and you’re just marketing the listing, then I would link them to the IDX listing page.
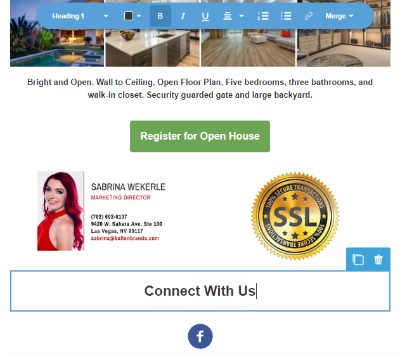
I’m gonna to add some text underneath about the property. I’m going to say bright and open. Wall to ceiling. Open floor plan. Five bedrooms, three bathrooms, and a walk-in closet. I could say a security guarded gate for the neighborhood, large backyard, and I already did a walk-in closet. You can tell I really like walk in closets. Doesn’t everybody though? I’m going to do a spacious backyard. I’m going to center this and bold the text.
Add a Signature Image and Branding
Now, we’re going to add an email signature. I have my email signature loaded in images. You can make it as big or as small as you want. Then on the right-hand side, I’m going to drag the image icon over to make the second column. You can add your branding details, so if there are any brokerage details that you have to add or anything like that, you can pop that in the second column. For now, I’m going to add a random image just so you can see what that would look like.
Suggested: How to Navigate Your Infusionsoft CRM
Add Brokerage and Copyright Info
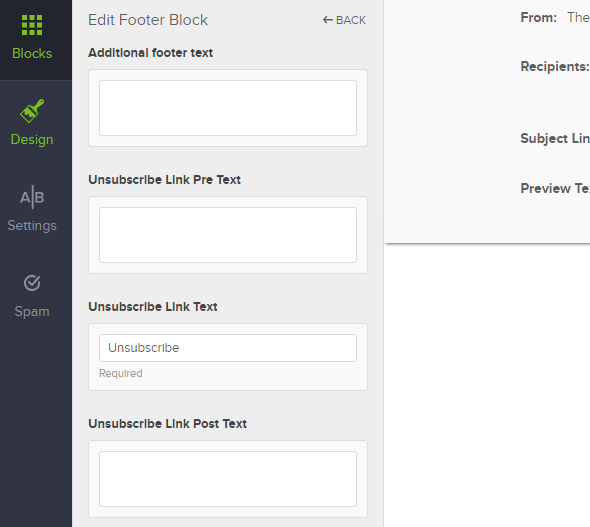
If you have any brokerage requirements that have to be on an email, you can either add another text box or if you click on this unsubscribe option down at the bottom, you could add additional footer text. So, you could say Copyright 2018. You could say you have a brokerage agency. Whatever details you need to put at the bottom there. That is basically how to set up a listing email using Infusionsoft email builder.
Infusionsoft Email Builder Tools
I’m going to go over some of the other options on the left-hand side of the building area. We already went over the text.
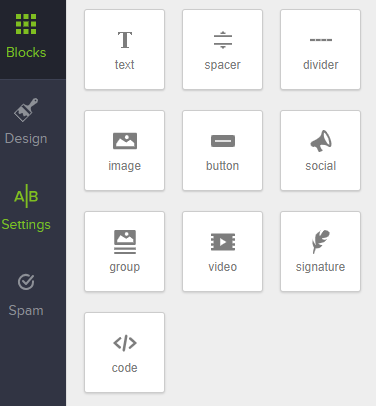
Spacer and Divider
There is a spacer option if you realize you want a gap between the two images, you can drag and drop the spacer underneath and then it creates a nice little gap. Again, on the left side, you can make it bigger or smaller based on your preference there. You can also do a divider. Dividers will create an actual line. So it’s like a spacer but you can actually see it. So again, on here you can adjust the width of that line if you want just a small line or if you want a big, long line. And then you can also change the color of that line from there.
Add a Button
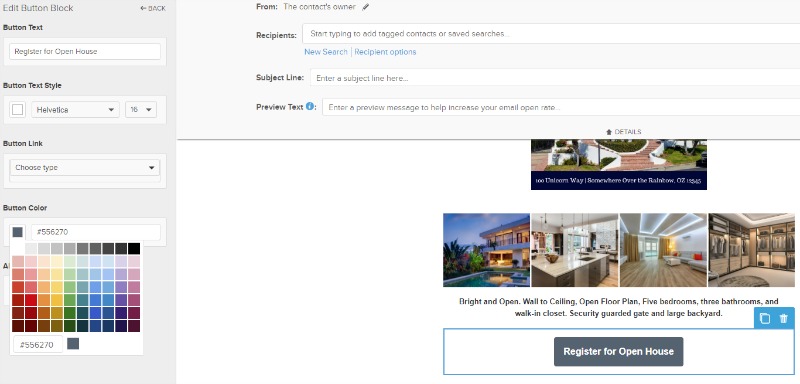
You can also add a button. So, if you want, we can put a button at the bottom here that says register for an open house, and then you can choose a link from here. There are different link types. You can do an URL, an email address, phone number, or file download. You can link it to a landing page, a web form, or an order form, if you have e-commerce capability.
For this purpose, I would do a web form and have them register via a web form. That way you have them in your database, and you would have to choose from one of your existing web forms. If you created a web form and the campaign, or even just a regular web form, you can also use an URL and just paste the URL to your form. Either way works, you can also change the button color. You can enter your own custom color, or you can choose from one of the colors provided. You can also change the alignment if you want it on the left, right, or center.
Related: How to Create Linked Contacts in Infusionsoft
Social Media Links
You also have social. So, if we drag and drop the social options at the bottom, instead of having the text here that says, Follow Me on Facebook, they have a cleaner social media option. You can add www.facebook.com/Loriballen to make a Facebook icon show up. You can add more social media options, too.

The social media icons populate right down at the bottom. It doesn’t have a text leading before, but you can change the icon size here, and you can always add your own text above it that says, Follow Us, or you can say Connect With Us. I’m going to center that, and I’m actually gonna make this one a heading too. I want the divider to be down there, too.
Grouping Option
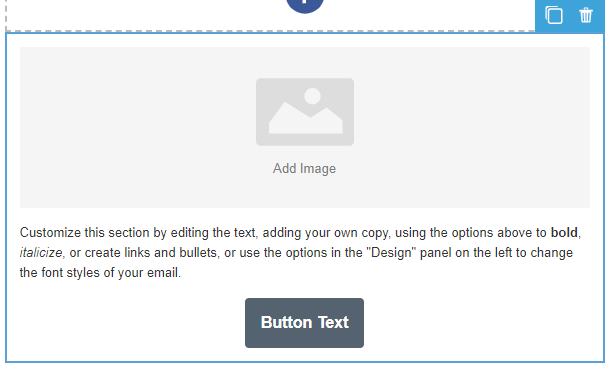
You also have a group that is an image, text, and button combined into one. So, you edit them just like you would if you were dragging the elements in separately, they’re just grouped URLinto one section. You can easily drag all three elements wherever you want them on your page.
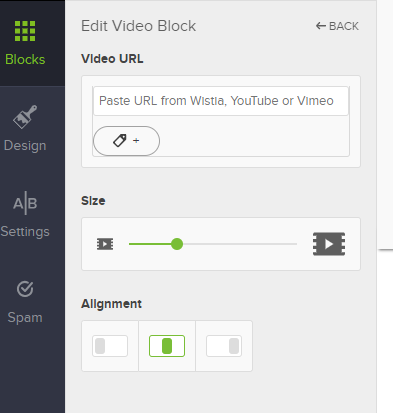
Add a Video from YouTube or Vimeo
You can also put a video in here. If I go to YouTube, copy an URL for the video you want to feature. Go back to the email, paste the URL in here, and it’s going to give you the option just like an image to make it bigger or smaller. Now when they click on the video, it will take them to YouTube or to Vimeo, wherever that video is hosted. If you’re going to do that, make sure you have a killer call to action on that page or on your video or in the description that gives them the opportunity to learn more about that property because it’ll take them off of the email. So, you want to make sure that you’re directing them in the right direction.
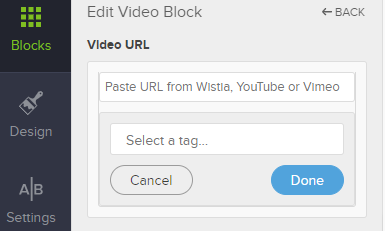
Links, Tags, and Triggers
Now, the cool thing about links, and this goes for pretty much any link, is a little tag option underneath the URL. Now, what this does is when they click on the link, you can have it apply a tag to that contact record. For example, if you want one of your agents to follow up with them, if they watched the video, then you can have a tag apply that then triggers an email or a task to one of your agents or to yourself to follow up with that person. You can also automate it in a campaign to where if they click on it, then it can send them another email, maybe with more details so you can really customize this experience and automate your follow ups based on what they interact with, which is really cool.
Infusionsoft Signatures
You also have your signature option. This pulls the signature from Infusionsoft’s signature settings. There are some cool signatures in here. They are very clean, very nice looking, but sometimes I like the jazzed up signature versus a signature here, but either way works perfectly fine whether you have it as an image or you want to use Infusionsoft’s signature. If I have them side by side like I do in my column, it cuts off my email, where with the image it did not cut off the email based on the way that I had it set up. So, you’re going to have to play with it and see which one works best for you.
Adding HTML
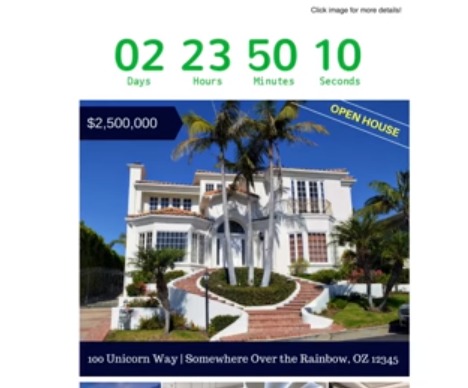
The HTML is an advanced option there, but if you ever find yourself needing to add HTML code to your email, they do have an option for that. One example would be if you use a tool called Plus This. There’s a countdown timer inside of this Plus This tool. I’ll actually go ahead and show you guys this here. Plus, this is a really, really cool tool you can sign up via our link on Loristools.com. If I want to add a feature, and I’m going to add a timer, I can choose a fixed date and time. You can choose a date in your contact’s field. I’m going to choose what font I want and what color. I’m going to make it green. It gives you the option to copy an HTML code. Now, in the new email builder, this is actually just going to be an URL. If I go to my image here and drag it up top, there is an option down at the bottom that says custom image URL. I’m going to paste that code. Now when they go to view this email, they have a countdown timer that tells them, “Hey, the open houses in two days, 23 hours, 50 minutes, eight seconds, and counting.” It creates a sense of urgency there and draws more attention.
Need Help? Contact Ballen Brands!
That is how to edit your email in Infusionsoft. It’s a fairly simple process. Drag and drop editor, play with it until it’s appealing and how you like it. If you have any questions, you can reach us at team@ballenbrands.com. We do offer Infusionsoft campaigns and services. So, if you are interested in Infusionsoft or you have Infusionsoft and you need some help with it, don’t hesitate to reach out. We’re always happy to help. You can also reach our team via phone at 702-917-0755. We have a wide variety of training videos on Infusionsoft available on our Ballen Brands‘ YouTube channel.
Related Posts

Best Real Estate Website Builders (And Why Agents Keep Choosing Ballen Brands)
This guide breaks down the best options on the market right now, what they do well, where they fall short, and how to choose the one that fits where your business is actually headed
How to Decide If You’re Ready to Invest in a Real Estate Website
Before you invest, it helps to look at your goals, your capacity, your current marketing gaps, and the long-term role you want your website to play.
What You’re Actually Paying for When You Invest in a Real Estate Website
Before you decide whether the cost feels too high, it is worth slowing down and asking a better question: what are you actually paying for?
Why Your Real Estate Website Is a Long-Term Business Investment
A strong real estate website gives your business structure, continuity, and long-term usefulness in a way that a temporary marketing expense cannot.

Best Real Estate Website Builders (And Why Agents Keep Choosing Ballen Brands)
This guide breaks down the best options on the market right now, what they do well, where they fall short, and how to choose the one that fits where your business is actually headed

How to Decide If You’re Ready to Invest in a Real Estate Website
Before you invest, it helps to look at your goals, your capacity, your current marketing gaps, and the long-term role you want your website to play.

What You’re Actually Paying for When You Invest in a Real Estate Website
Before you decide whether the cost feels too high, it is worth slowing down and asking a better question: what are you actually paying for?

Why Your Real Estate Website Is a Long-Term Business Investment
A strong real estate website gives your business structure, continuity, and long-term usefulness in a way that a temporary marketing expense cannot.